Email marketing gets a bad rap. Countless companies send out a ludicrous number of emails on a daily basis with spammy subject lines such as “You’ve Been Selected! Get 20% Off Today Only!”. (I’m looking squarely in the direction of a large home furnishings company.)
Even though the reputation isn’t great, email marketing, particularly automated email marketing, presents a huge opportunity for ecommerce store owners.
What Are Marketing Automation Campaigns?
Marketing automation is a term that covers all marketing activities that are done automatically for you and your store.
Email is a great example of this because there a few types of email campaigns that should be sent at predictable and repeatable times. Since most of the emails that you send will be largely the same it makes sense to automate the process as much as possible.
Email marketing automation is also great because it lets you close the loop on the buyer sales process without having to do anything manually. Think about it this way… if you had to manually send an email to every buyer who doesn’t complete the checkout process, would you even do it? That’s where automation comes in. It takes the tedious, but very valuable, tasks like cart abandonment and customer re-engagement and does all the work for you.
Why Use Mailchimp Automations?
We’re huge fans of Mailchimp. Mailchimp does a fabulous job of integrating with Shopify and providing several automation options so that a lot of effective marketing can be done for you — while you focus on other areas of your business.
If you’ve never used Mailchimp automations before, take a look at their marketing automation knowledge base for detailed information.
We implement most of the email automations that Mailchimp has available, but there are a few that we make sure we implement for each and every store. Here are the email marketing automations that we setup in Mailchimp for every Shopify client.
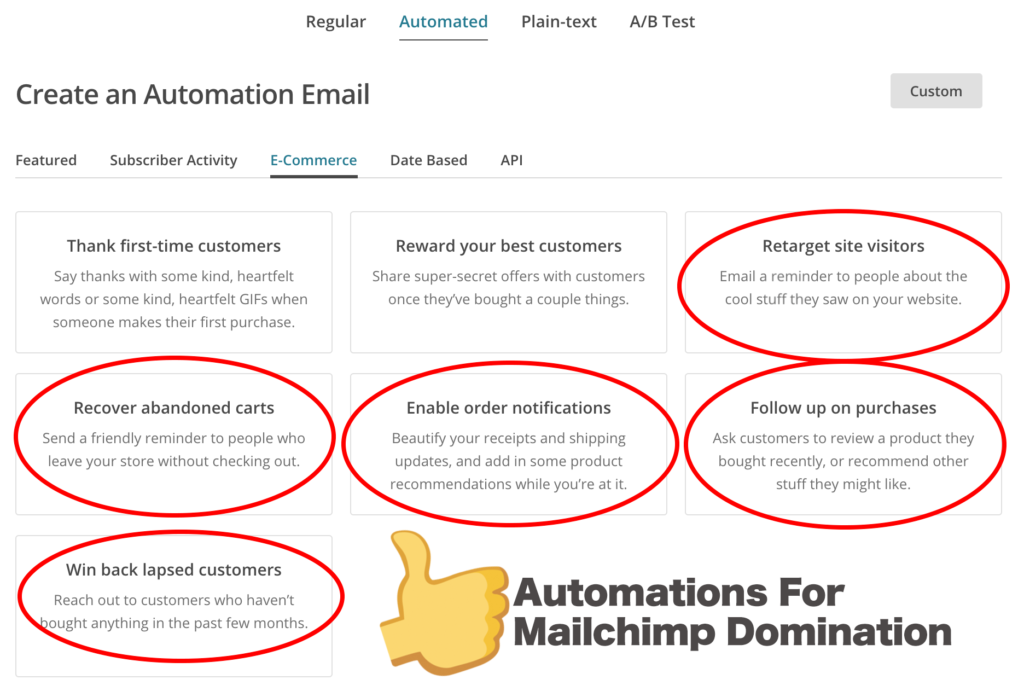
#1 – Ask for Product Reviews from Buyers
Why Product Reviews Are Crucial for Shopify Stores
Product reviews are pure gold for Shopify stores. It instills confidence in buyers when they can see that your products have (at least) several good reviews. It’s been shown that having 50+ product reviews can increase conversion rates up to 4.6%.
Reviews are also great for SEO because it’s a consistent source of fresh, semantically relevant content for your product pages. Yotpo has some fascinating data about how brands that started collecting product reviews saw nearly 50% increases in organic traffic after 3 months.
Product reviews can kick off a virtuous cycle of organic traffic growth, which leads to more reviews, and so on.
If you’re looking to add product reviews to your Shopify store then I recommend starting with Yotpo (starts at free, price increases with additional features). If you’re looking for a free solution then check out Shopify’s own product reviews app.
Using Mailchimp Automations to Get Product Reviews
This is one of the easier automations to setup because it’s just a single email.
Start by choosing the “Follow up on purchases” automation from the E-Commerce tab.
Then choose the name for your automation campaign. I suggest something like “Product Reviews”.
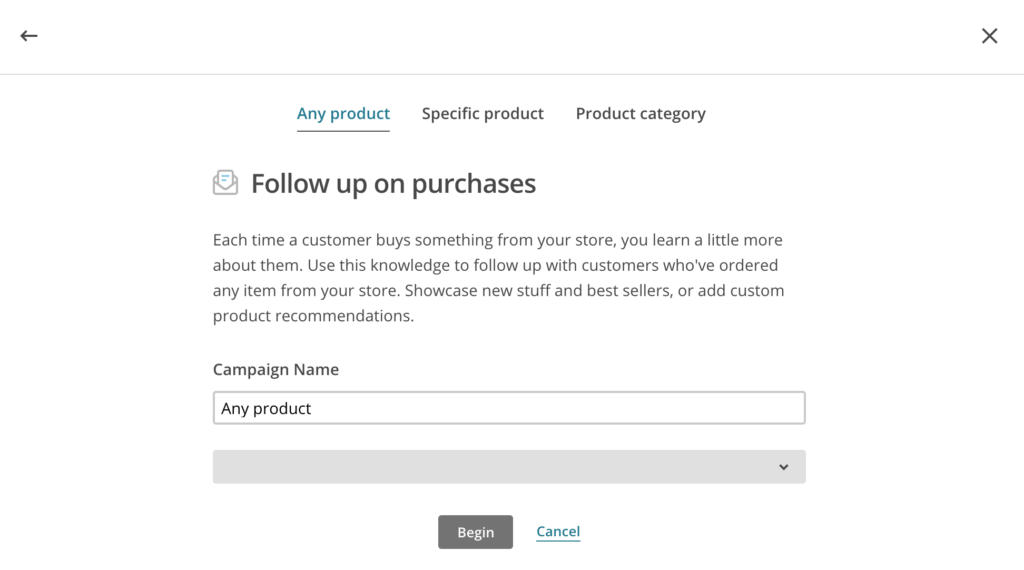
You’ll also want to choose the products that you want the automation to fire on. Usually you want to fire the automation on purchases for all products, but I can envision scenarios where you want to target specific products or categories only.
Then you’ll see the email sequence screen. This automation only has a single email.
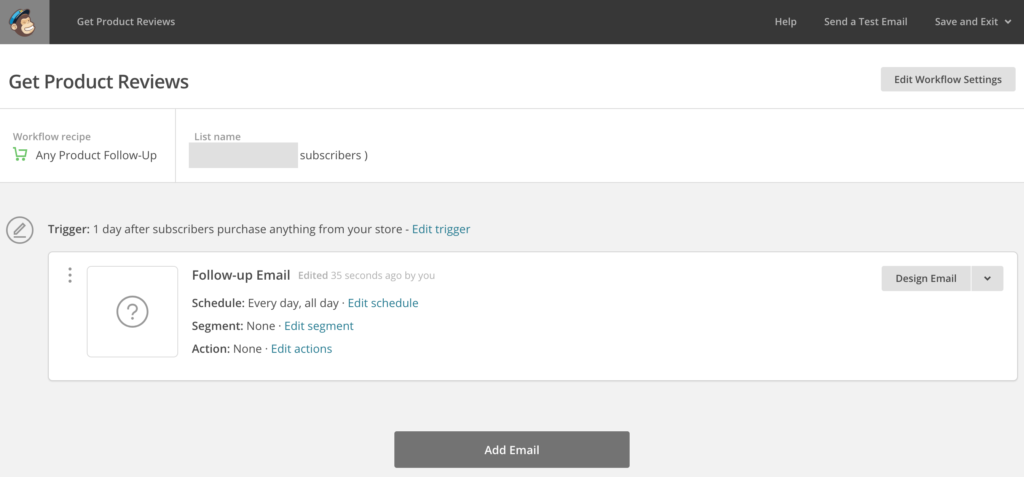
You will want to set the trigger to the number of days that it typically takes for your customers to receive their purchases. For example, if customers typically receive their goods 4 days after ordering then you may want to set the automation to fire after 6 days so that they will have time to use the product before getting your review request.
The actual email design is up to you and your brand. It also depends on the product review app/service that you use. It’s always a good idea to tell your customers how important it is for the community at large for them to leave honest reviews on your site.
Note: we haven’t found a way to have Mailchimp send a link to the specific product that the customer purchased, so you’ll need to use more generic language here.
#2 Win Back Previous Customers
Customer Re-engagement Campaign Strategies
Keeping previous customers engaged with your brand is one of the best ways to utilize Mailchimp automations. If a previous buyer hasn’t made a purchase in the last X days you can automatically email them with a list of your best-selling products, specific product recommendations based on their purchase history with your store, or even something more custom, such as seasonal products.
You’ll need to put a little thought into the actual content of the win back emails that you send. A lot of this depends on your brand and the types of products that you sell.
If you’re a company that has seasonal products then you might want to update the automations seasonally so that you’re always sending current products to customers.
If you tend to sell the same products throughout the year then it’s simpler and you can likely just keep the same email content year round.
How to Create Customer Re-engagement Campaigns in Mailchimp
To get started, choose “Win back lapsed customers” from the E-Commerce tab.
Then you’ll be presented with a sequence of 3 emails triggered at 120, 240, and 360 days after the most recent purchase. You can be more aggressive with these dates if you want, but I wouldn’t go less than 60 days between emails.
You’ll need to do the following for each of the 3 emails in the sequence.
First, you’ll input the basic email setup items like the subject line, from name, etc.
Then you’ll get to the good stuff. Choose the “Sell Products” template.
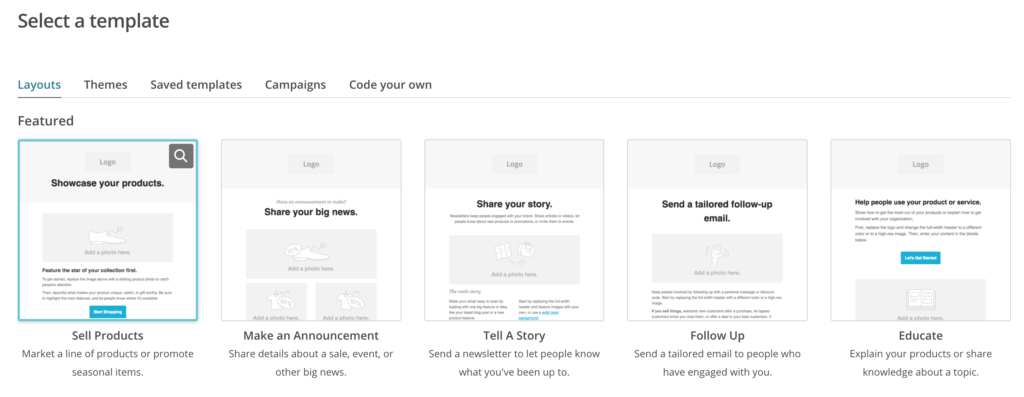
Once you’re inside the email editor, you’ll see a couple of new content blocks that you can drag into the email design. These are “Product Recommendations” and “Products”. Product Recommendations are recommendations made automatically based on the shopper’s previous purchases. The Products content block allows you to display either a list of best-selling products or specific products.
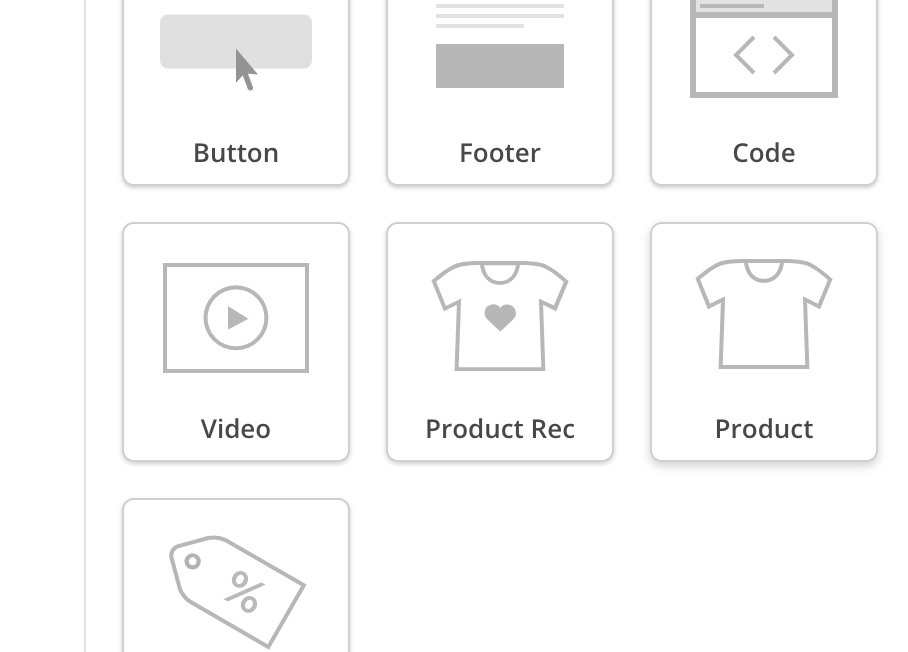
Then add your logos, customize the branding, and add some copy. All done.
#3 Improved Receipts
How Showing Product Recommendations in the Order Confirmation Email Can Boost Sales
Ah, the order confirmation email / receipt… the forgotten part of the email marketing ecosystem. Email receipts get a whopping 70% open rate, so you can’t afford to just take them for granted and go with out of the box receipts from Shopify.
Order confirmation emails are a fantastic place to promote additional products or upsells to shoppers. There’s never a better time to make product recommendations or push your best-sellers than right after a purchase has been made. Customer trust is typically very high at this point or they would not have made a purchase in the first place.
How To Add Product Recommendations to Shopify Order Confirmations in Mailchimp
This is one of the simpler automations to add, just because there aren’t quite as many options.
First, choose “Enable Order Notifications” from the E-Commerce tab. You’ll then be presented with a few different order update emails that you can send. I’m specifically talking about the “Order Confirmation” email here, but you can also send your product recommendations with the “Shipping Update” email.
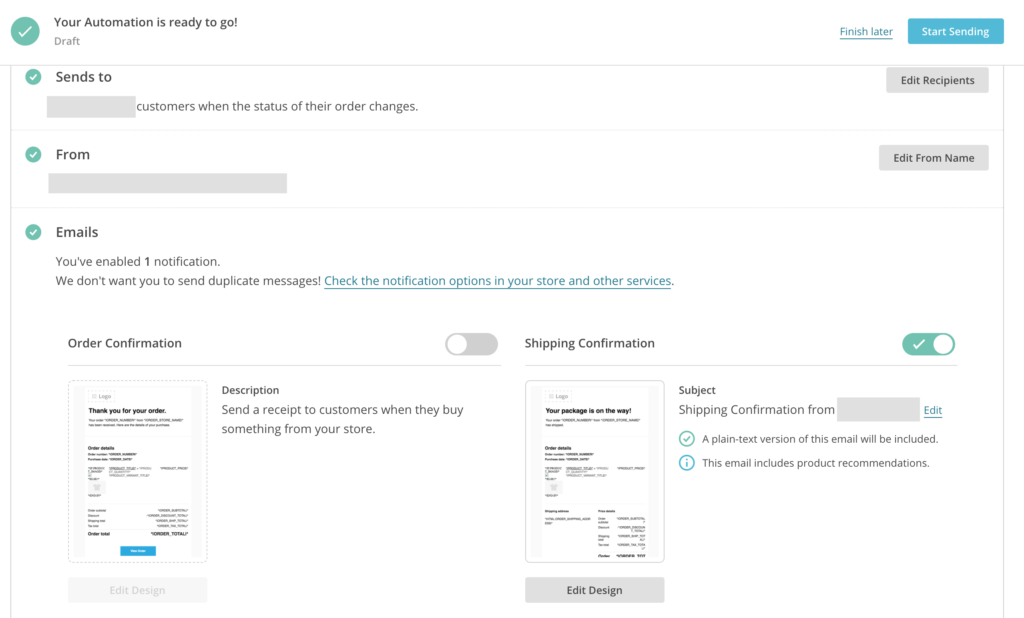
When you edit the design for the Order Confirmation email you really only need to add your branding. The product recommendations are automatically included at the bottom of the email. Easy peasy.
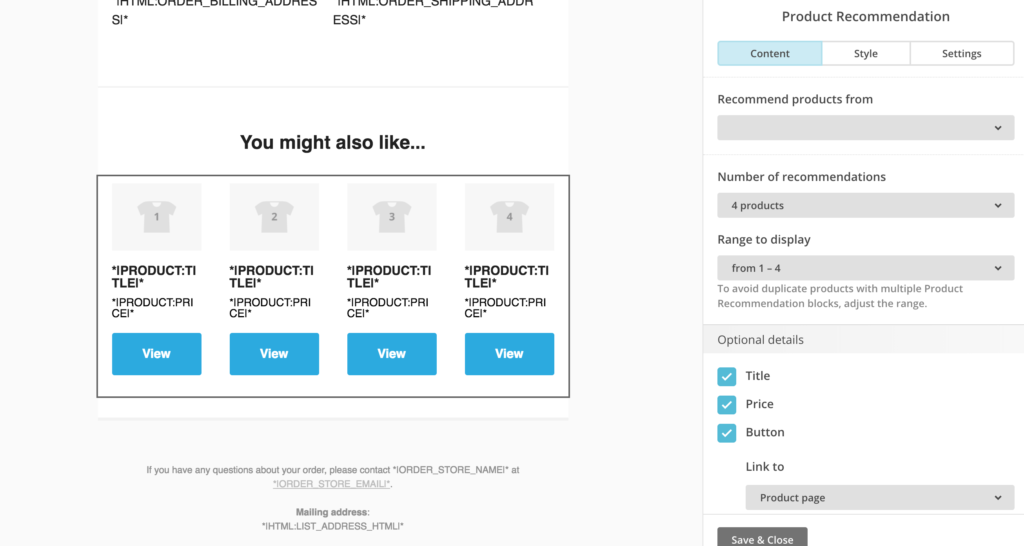
Be sure to turn off your regular receipts in Shopify. You don’t want to confuse customers with duplicate emails.
#4 Retargeting Customers Who Viewed A Product
The Cart Abandonment and Product Retargeting campaigns are very similar, but both are effective. The difference is that the retargeting campaign will send a recently viewed item to a potential buyer if they did not add the item to cart.
How to Create Product Retargeting Emails in Mailchimp
First, choose “Retarget Site Visitors” from the E-Commerce tab to create the new automation campaign.
You’ll need to choose the store you’d like to send product retargeting emails for.
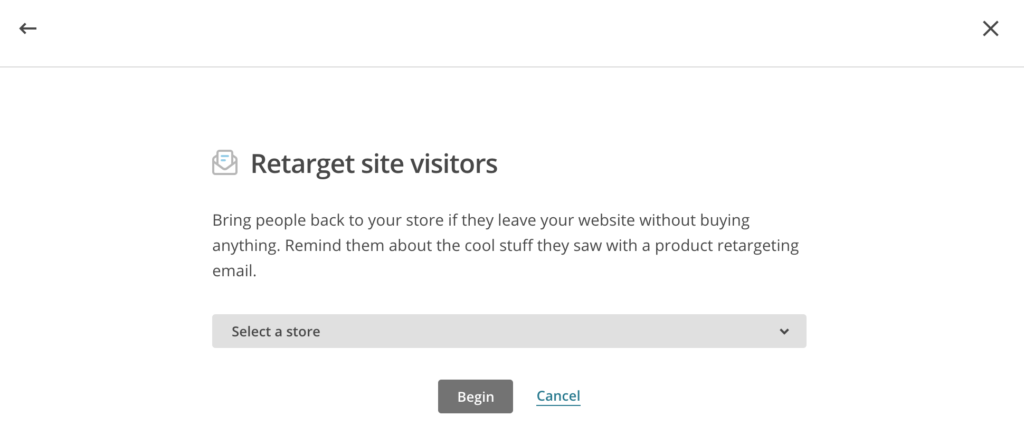
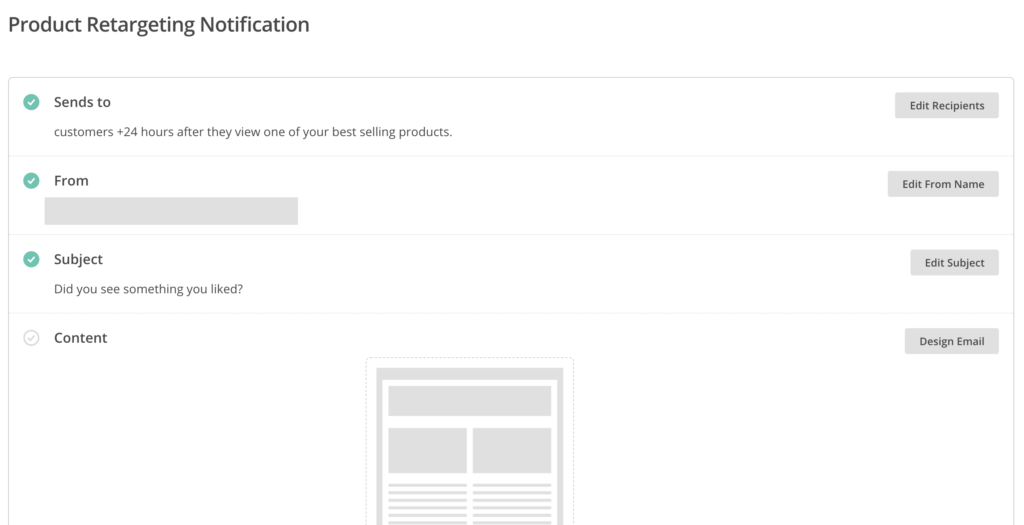
There aren’t many options for the Product Retargeting email either, and I recommend keeping the 24 hour timeframe as well as the subject line suggested by Mailchimp.
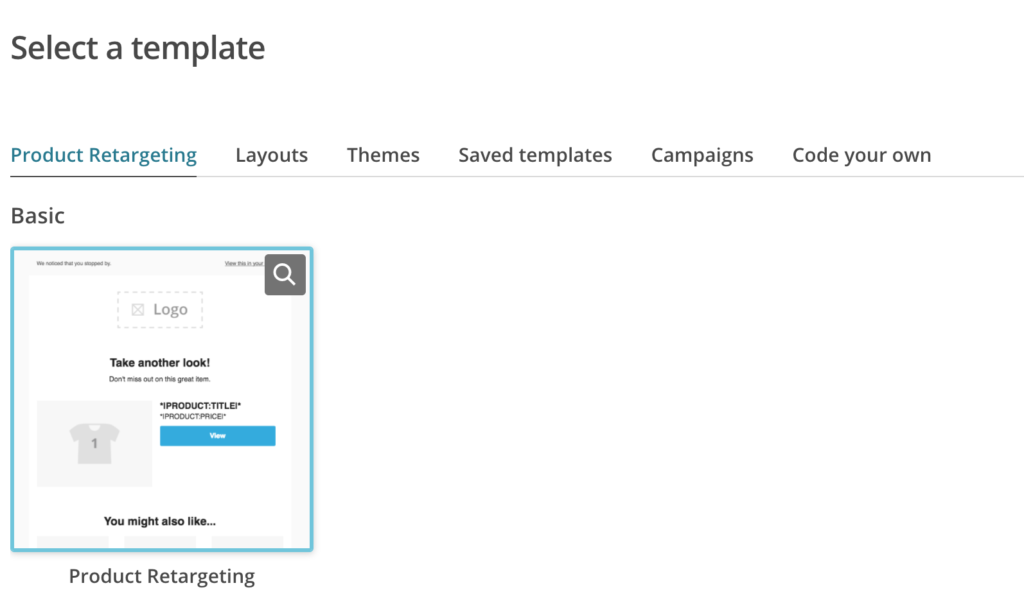
Only one template shows up for Product Retargeting, so choose that one.
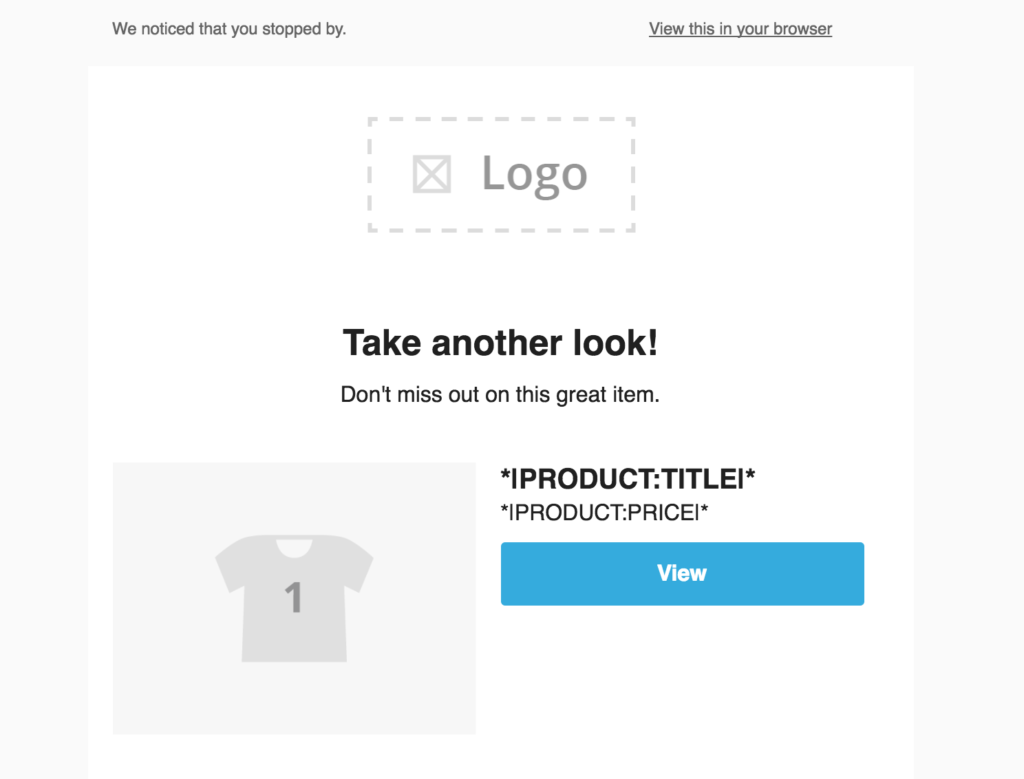
There’s little to config here. Just add your usual email branding and you’re good to go. You can change the copy a bit if you want, but I would leave it as-is to begin with.
#5 Cart Abandonment
Why You Should Use Mailchimp For Your Cart Abandonment Emails
The current best-guess is that about 69.23% of all ecommerce carts are abandoned, meaning that just 3 out of 10 shoppers actually complete the checkout process.
Luckily, email automations that target abandoned carts work fairly well. They have been known to get great open rates of 44% with a 5% conversion rate. The 5% conversion rate is a very strong addition to any store’s base conversion rate.
Cart abandonment emails are an automation that every store should use. That’s why it’s a built-in feature in Shopify. Shopify’s feature does a good job, but as of now it’s a bit limited. I prefer to be a bit more aggressive with cart abandonment campaigns and send 3 emails instead of just 1. That’s where Mailchimp comes in.
Bonus Tip!: A couple of other cart abandonment services (outside of Mailchimp) are Jilt and Carts Guru. As your store grows you might want to look into these options and see if you can coax better conversion rates out of them.
How to Create a Cart Abandonment Series in Mailchimp
Choose “Recover Abandoned Carts” from the E-Commerce tab when you create a new automation.
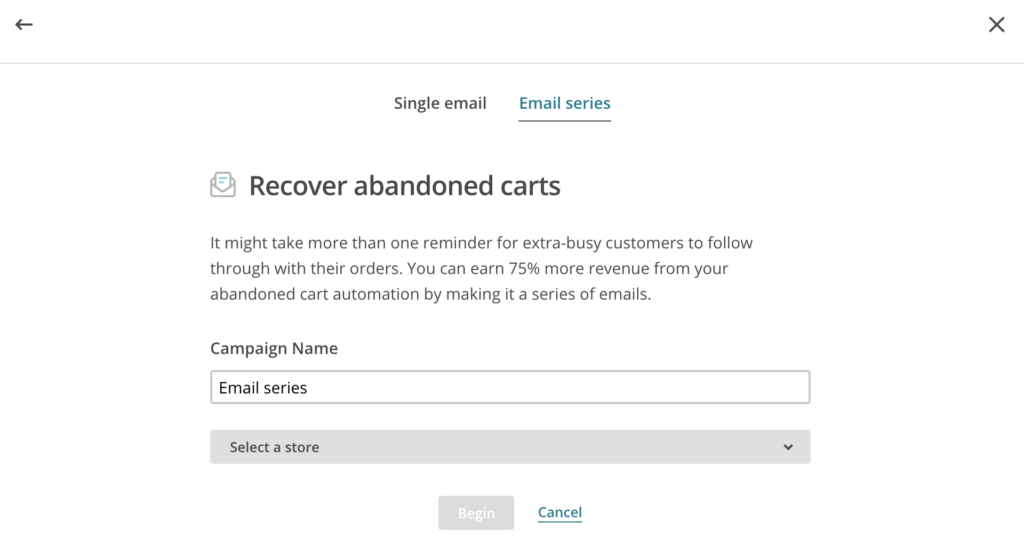
Then, you’ll want to choose a series of emails versus just a single email. According to Mailchimp the series generates 75% more revenue than a single email.
Then you’ll be presented with the 3 emails in the series. Emails go out 1 hour, 1 day, and 3 days after the cart is abandoned. I would stick with the default settings here.
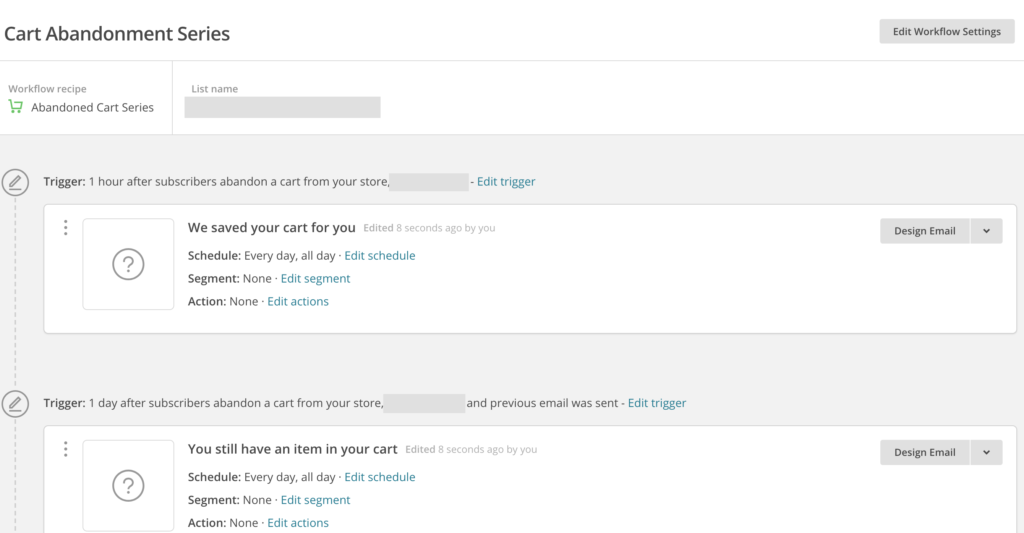
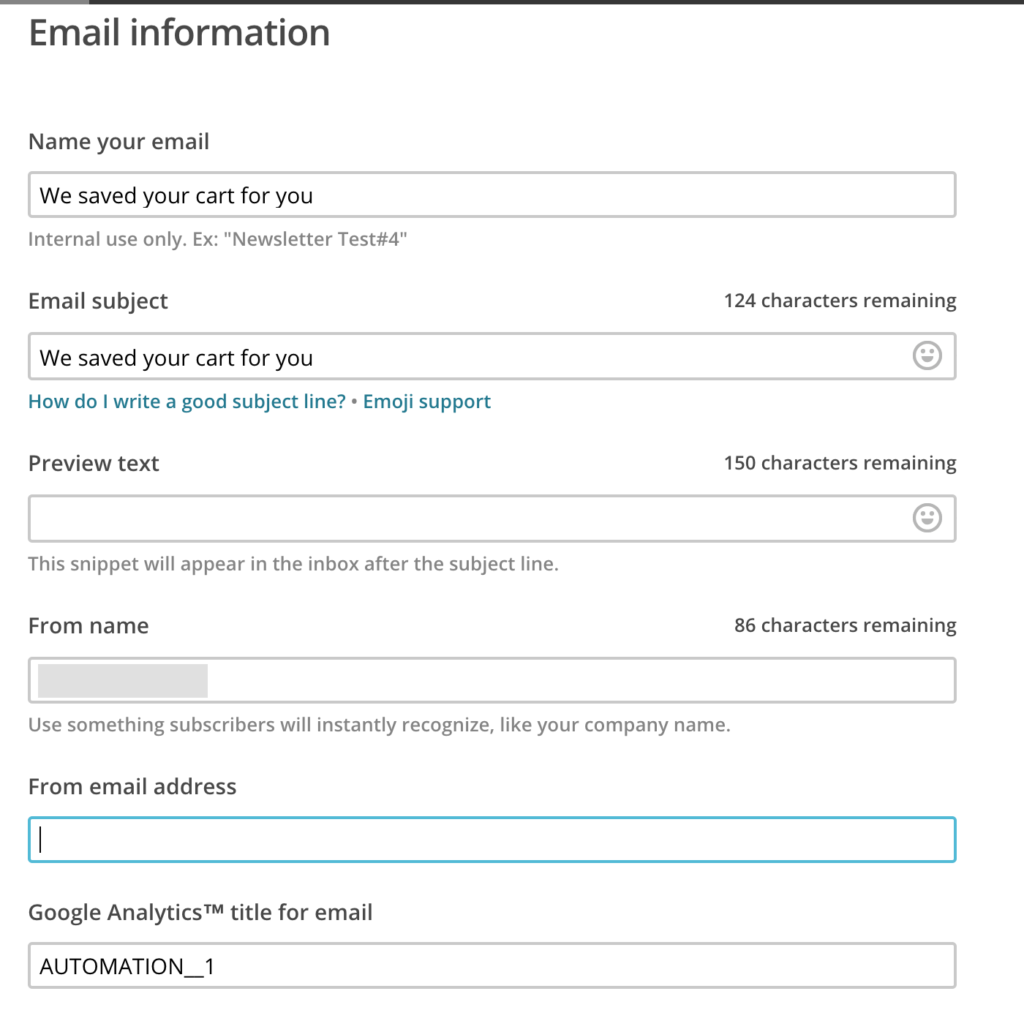
You’ll want to go through the follow process for each of the 3 emails in the series. Once you click Design Email you’ll be asked to enter the details about the email.
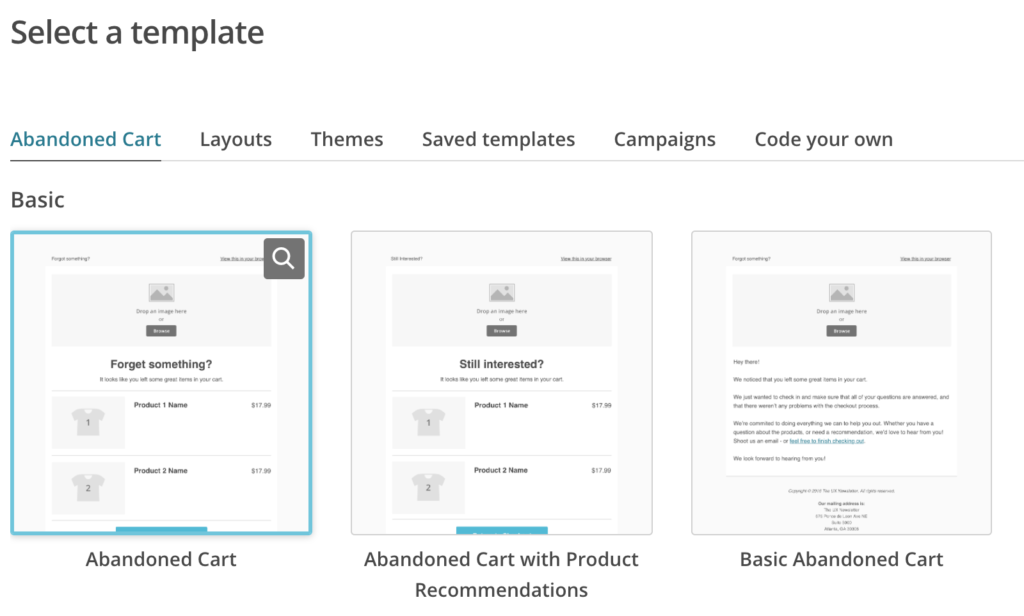
Then you’ll be asked to choose which template you want to use. There are 3 options here. My recommendation would be to start with the first template, “Abandoned Cart”, because it’s simple and doesn’t show product recommendations. However, this is definitely something that you’ll want to A/B test for your brand.
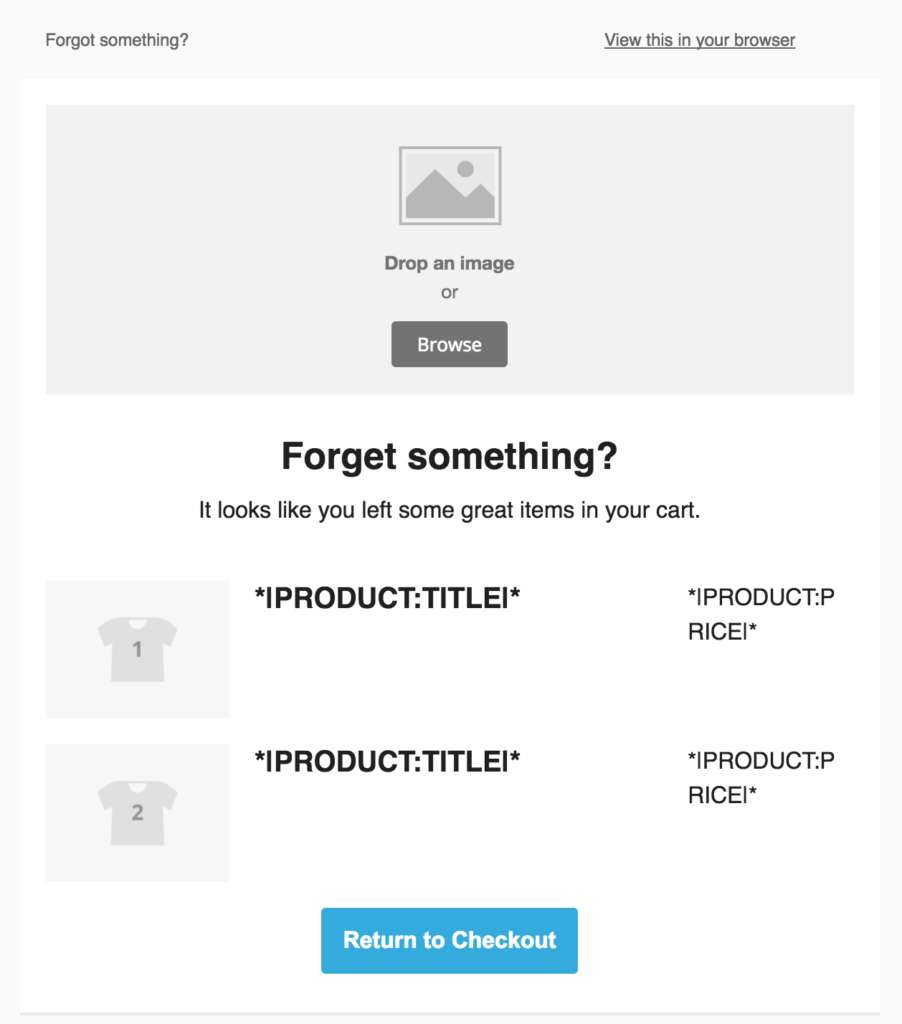
Then you can add your logo, branding, and tweak the copy to finish up the campaign.
Conclusion
Email marketing is a critical portion of the ongoing digital marketing plans for any ecommerce company, but that doesn’t mean that you need to have someone spending several hours per week writing emails. You can have Mailchimp handle at least a portion of this workload with their automations. Set it and forget it (for the most part).
Are there other Mailchimp automations that you use religiously? Tell us about them in the comments!

Great post. But i think you forgot a very important part. Althought it might increase some sales, customers like to be seduced with creative emails instead of being annoyed with constant agressive marketing emails.
A series of 3 emails for cart abandonmnet? Really? That is asking the customer to block our email for life.