One of my absolute favorite reasons for using Shopify is the accuracy and ease of setup for conversion tracking. Conversion tracking is incredibly important for any ecommerce site, and it’s crucial that you get it right.
Conversion tracking is even more important when you’re running paid ad campaigns in Google Ads, Facebook Ads, Microsoft Advertising, or any other ad platform. If you’re spending money then you have to know what kind of return you’re getting.
When taking on a new Shopify PPC client the first thing I do is make sure that the conversion tracking is configured correctly for 1) Google Analytics, 2) Google Ads, 3) Facebook Pixel, and 4) Microsoft Advertising (if they’re using it).
Setting up Google Analytics Conversion Tracking for Shopify
Getting conversion data in Google Analytics is table-stakes for anyone with a Shopify store. The benefit is that you’ll be able to see where your sales are coming from, whether they’re from organic search, website referrals, paid ads, social media, etc.
So this step applies to anyone, even if you don’t run paid ads.
Fortunately, setting up Google Analytics inside Shopify is extremely easy! You’ll be ready to go in under 60 seconds, assuming you already have a Google Analytics account.
Configuring Google Analytics for Ecommerce
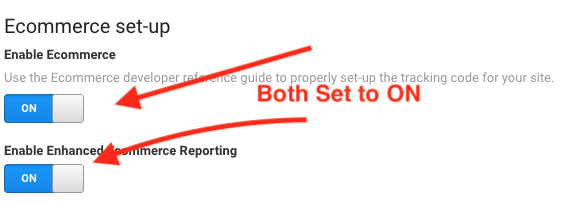
First, you’ll need to make sure that your Google Analytics profile is set up for ecommerce inside the Google Analytics settings.

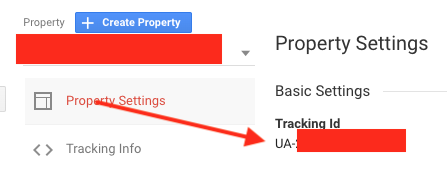
While you’re in the Google Analytics admin, you might as well grab your account id. These id’s typically have the format “UA-1234565-1”.
Configuring Google Analytics Inside Shopify
Here’s the easiest part of all. Inside your Shopify Admin, just go to Online Store > Preferences.
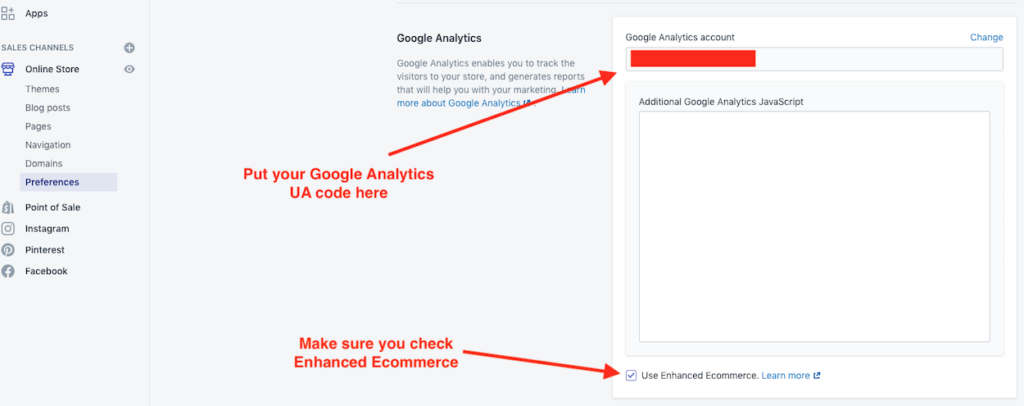
It’s the easiest Google Analytics configuration ever. You’ll see all of your ecommerce purchases data in Google Analytics, including product data and all of the benefits of Enhanced Ecommerce.
Optional: View the Shopify Checkout Funnel in Google Analytics
If you’ve done the above steps then you’ll track your conversions in Google Analytics just fine. However, if you need a little bit more information on your customers’ tendencies then you might want to set up a Google Analytics goal to track how many customers go through each step of Shopify’s checkout process.
Shopify generally does a fantastic job of optimizing the checkout flow, so this typically isn’t an issue, but if you have a nagging feeling that you aren’t converting as well as you should then you might want to do this.
In your Google Analytics admin you’ll need to create a new goal. Call it whatever you want, but make sure that you name it so you’ll know this is just for analyzing your checkout process.
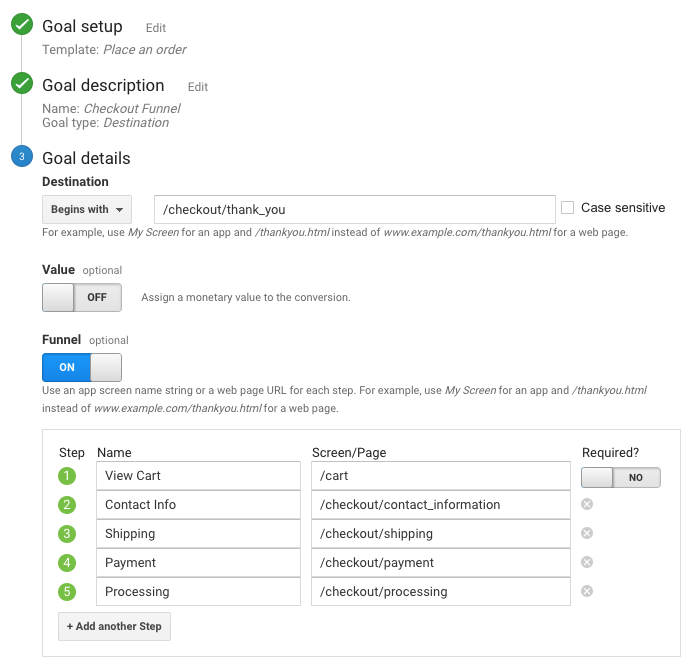
This captures each step of the Shopify checkout funnel.
- The View Cart page
- The first part of the checkout process, where customers enter their Contact Info
- Then the Shipping options page
- Then the Payment details page
- Then the Processing page
- And finally the Thank You page, which is where the goal conversion is triggered.
A couple of things to note from this setup:
- We aren’t sending a conversion value here. We’re already tracking order values with our ecommerce tracking, so this isn’t necessary.
- I like to start the funnel with the cart page, because most stores will let that be the first step in the checkout process. If that doesn’t apply to you then you can adjust accordingly.
- Make sure you set ‘Funnel’ to ON so that you can enter the URLs for each step of the checkout process.
- I don’t like to make the first step by required, just to maximize the accuracy of the tracking.
- If you have data in your account you can click the ‘Verify Goal’ link at the bottom of the page to see what your conversion rate would have been. If you get a ‘no conversions’ message and you know that you’ve had conversions take place in the last week then you’ll want to double-check all of the settings for the funnel to make sure you don’t have typos.
Importing Google Analytics Conversions into Google Ads
Now that you have Google Analytics successfully tracking your ecommerce transactions, we’ll need to make sure that data gets shared to Google Ads. This will allow you to see which sales on your site came from your Google Ads campaigns.
Linking Google Ads to Google Analytics
The first step in this process is to make sure that your Google Analytics profile is linked to your Google Ads account so that you can share data (conversions, audiences, etc.).
First, make sure that you have admin-level permissions on both the Google Analytics profile and the Google Ads account using the same email address. That’s important.
Then you’ll need to start creating the link in Google Analytics.
Go to your Property-level settings in the Google Analytics admin and click on Google Ads linking.
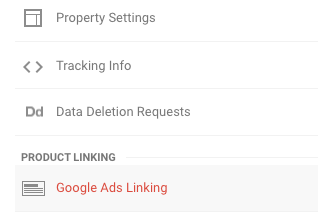
Choose the correct Google Ads account from the dropdown list and select Link.
Then you’ll go into Google Ads and choose Tools & Settings > Linked Accounts.
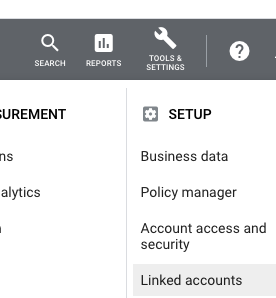
Then click the Details link under Google Analytics.
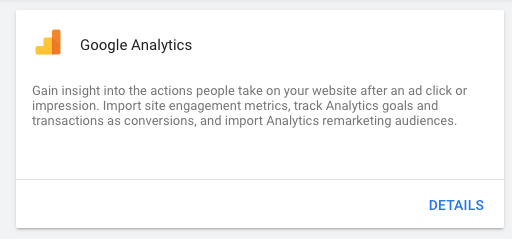
You should see your Google Analytics account listed there and be able to approve the link request.
Importing Purchase Conversions from Google Analytics
Now that you have Google Ads and Analytics linked, you can import your purchase data so that any conversions coming from Google Ads will be attributed correctly.
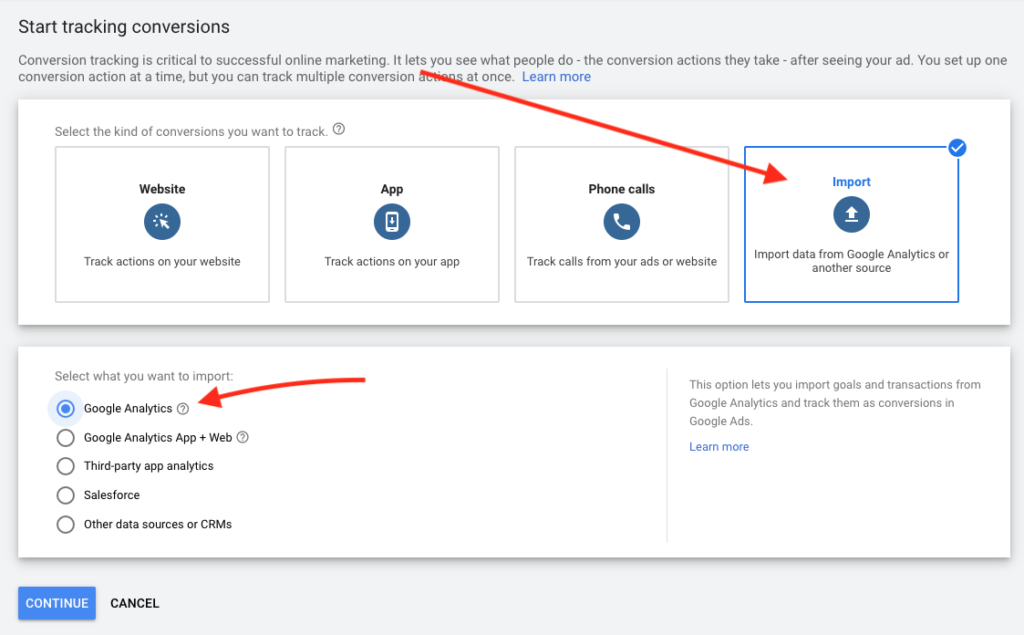
Next, you’ll see a list of the conversions that you can import from Google Analytics. Make sure that you choose a Transaction-type conversion to import, because those will come with all of the ecommerce data.
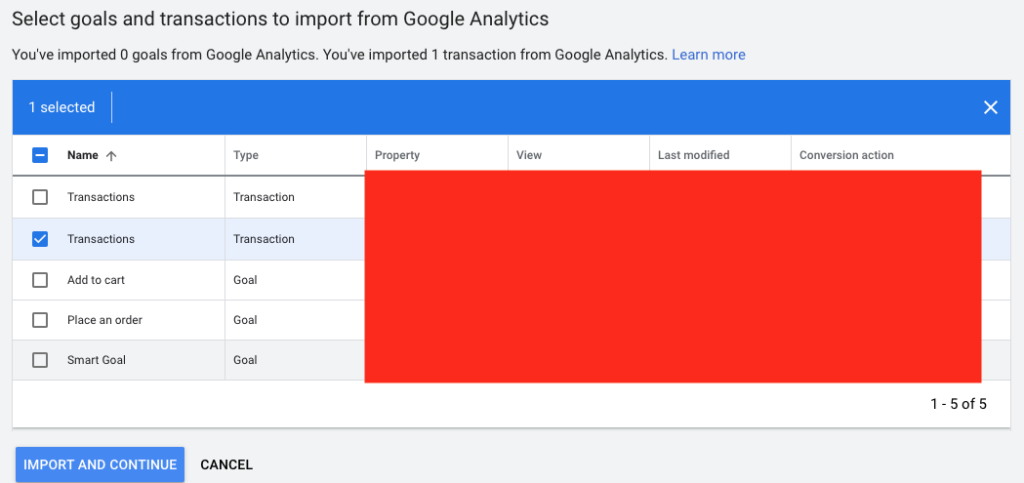
That’s it. You’ll need to wait a few hours (give it a day, just to be safe) for conversion data to start flowing.
Setting up the Facebook Pixel in Shopify
Just as you can track sales resulting from your Google Ads, you will need to make sure you’re accurately tracking sales coming in from Facebook Ads. This process is as easy as installing your Facebook Pixel.
Installing your FB pixel in Shopify is even simpler than Google Analytics. It should only take 60 seconds, tops.
Find Your FB Pixel Id
First you’ll need to find your pixel id so that you’ll know what to install in Shopify.
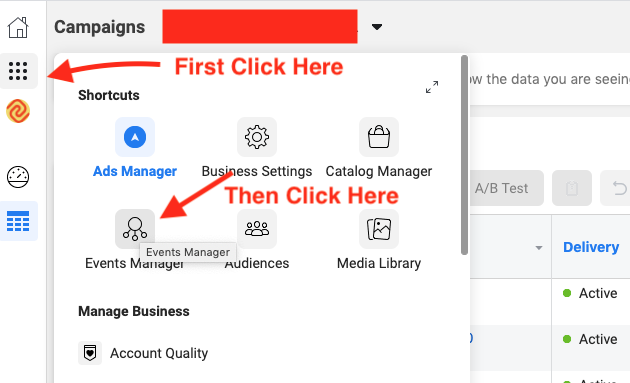
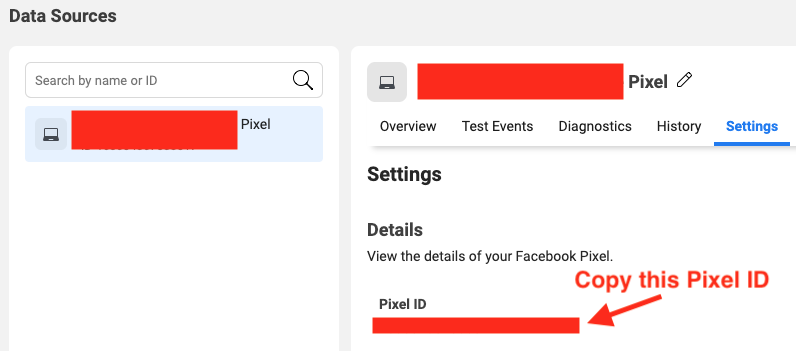
Installing Your FB Pixel in Shopify
Just like you did with Google Analytics earlier, we need to paste that ID inside the Shopify Admin. Again, go to your Shopify Admin > Online Store > Preferences.

That’s it! Shopify will automatically send all of the relevant Pixel Events like Page Views, Add to Carts, Purchases, etc. Hello fantastic pixel data!
Do You Need to Track Google Ads Conversions If You’re Already Importing Conversions From Google Analytics?
This far we’ve set up Google Analytics and have that data importing back into Google Ads, so we’re tracking which clicks resulted in sales. For the vast majority of advertisers this is perfectly sufficient! So you don’t have to continue any further.
However, if you are spending a significant amount of money monthly on ads and you’re getting a higher number of sales from those campaigns, say greater than 50, then you might want to experiment with tracking conversions directly within Google Ads. This gives you 2 benefits:
- You’re not importing from Google Analytics, so data could show up a little more quickly.
- You have more control over the attribution model. You can’t be 100% certain that all sales coming through your ad campaigns are being attributed back to your campaigns because Google Analytics also includes other channels like organic and referral. With native Google Ads tracking you can bypass this (potential) issue.
If you feel like native Google Ads conversion tracking could benefit you, then please proceed!
Setting up native Google Ads Conversion Tracking in Shopify
While the process for installing Google Analytics tracking and the Facebook Pixel couldn’t be simpler, installing Google Ads native conversion tracking is a much more manual process.
If you’re comfortable editing your Shopify theme then the process is fairly straightforward.
Creating Your New Conversion in Google Ads
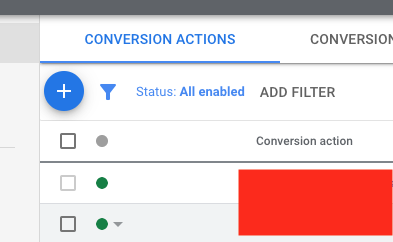
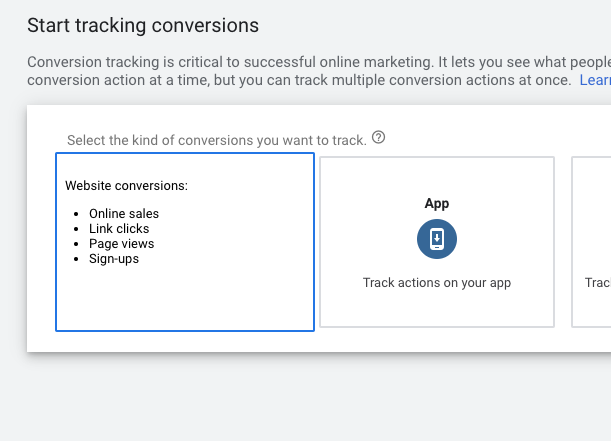
The first thing you’ll need to do is to create the conversion action inside Google Ads.
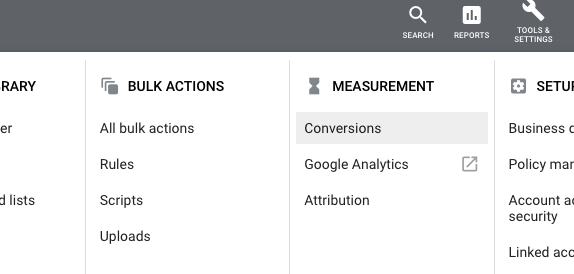
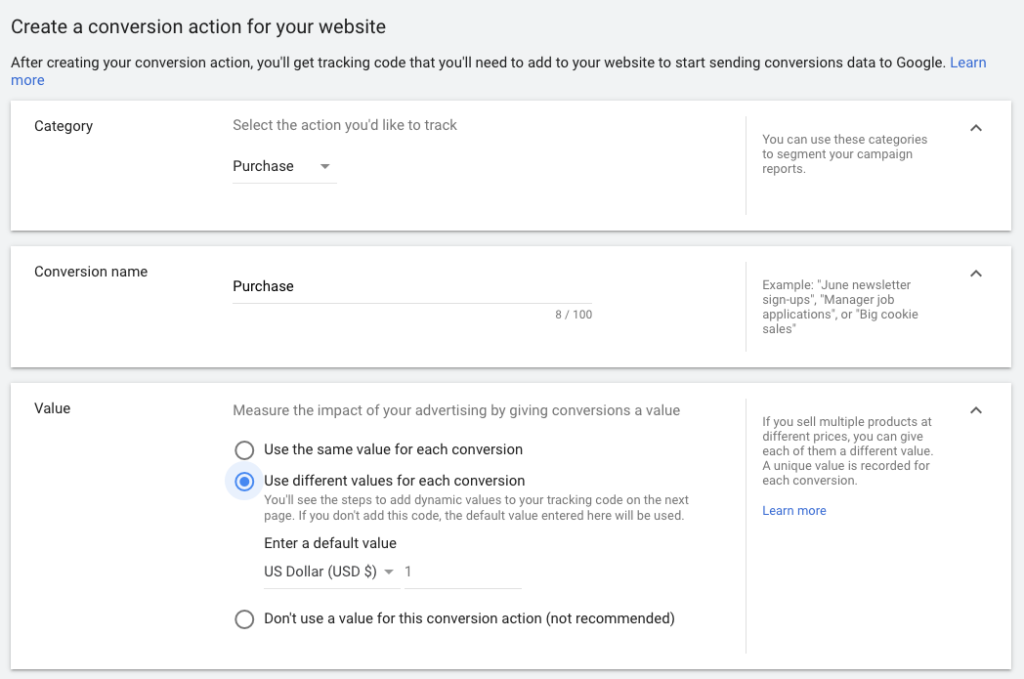
Let’s talk through the settings on the first half of this page.
- Choose ‘Purchase’ as your category, because we’re tracking website purchases.
- You can name the conversion whatever makes sense for you, but I would stick with something like ‘Shopify Transaction’.
- Choose ‘Use different values for each conversion’.
Once you’ve entered these options you’ll choose ‘Install the tag yourself’. That will display the code that you need to place in Shopify.
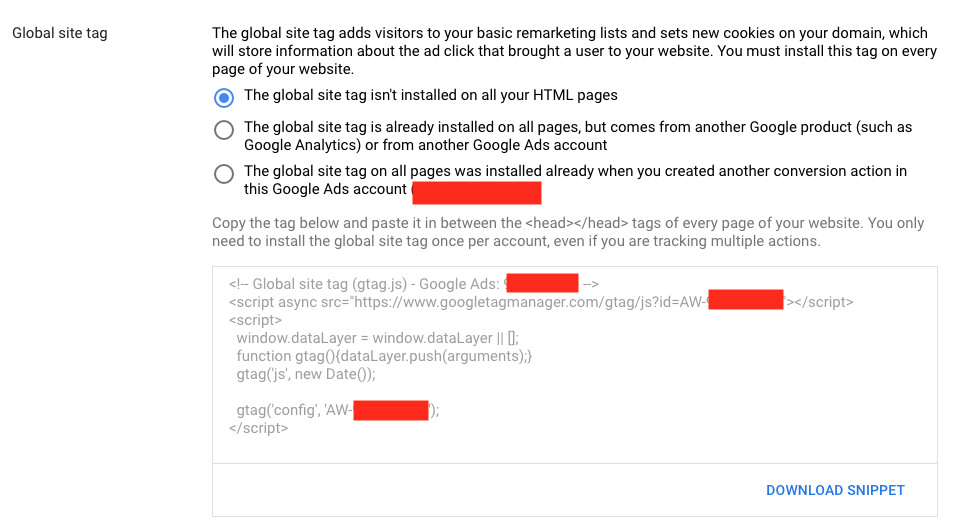
I like to use the ‘The global site tag isn’t installed…’ option because it’s just as much work and seems safer to me. Don’t do anything with this just yet.
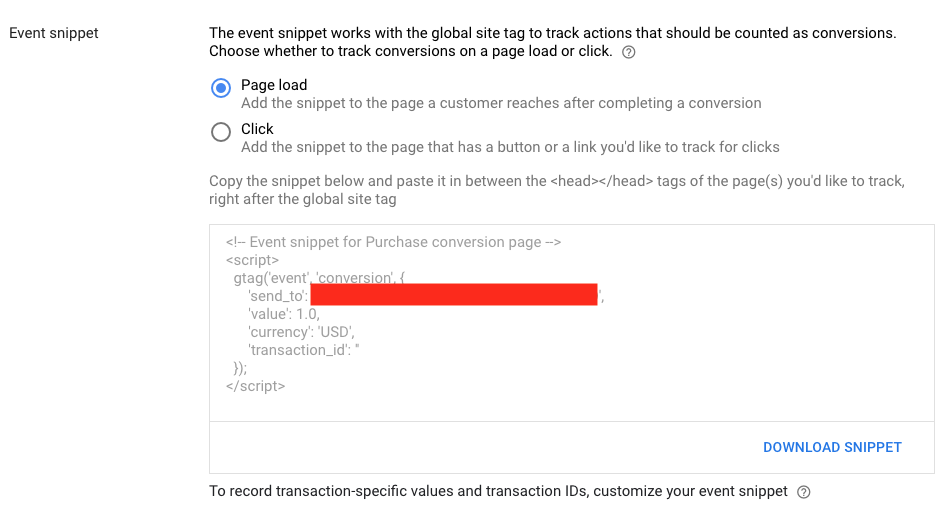
Finally, you’ll be shown the snippet that actually tracks conversions for you and sends the data back to Google Ads. We’re going to customize this code, so all you need to pay attention to here is the Conversion label, which is what is set in the ‘send_to’ part of the snippet.
Installing The Global Site Tag in Your Shopify Theme
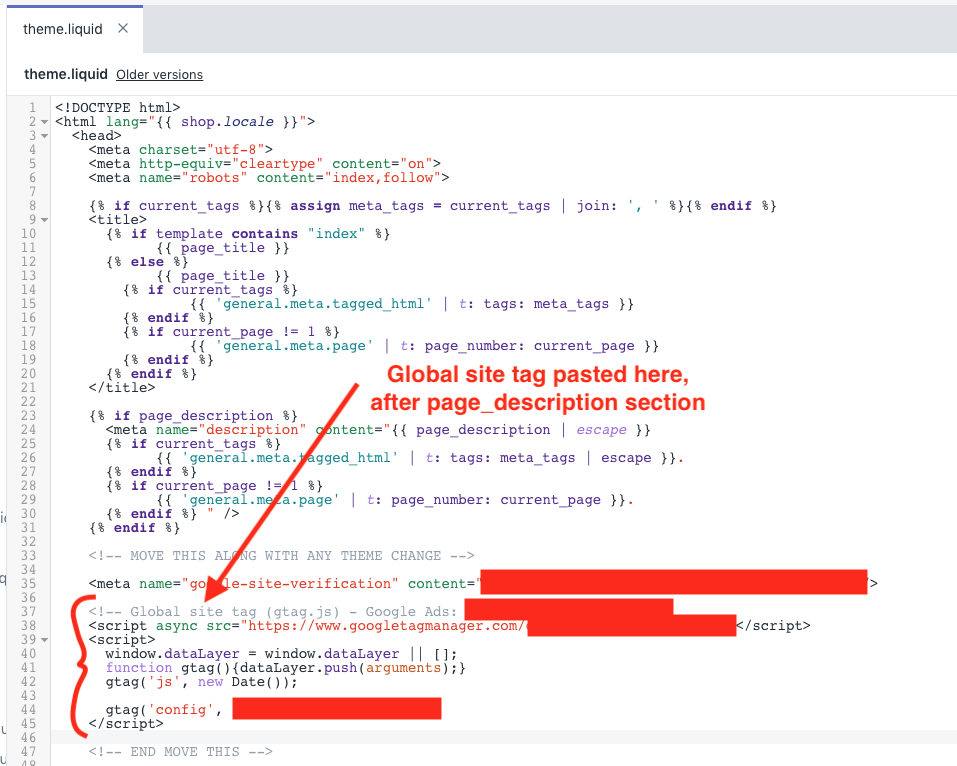
The Global Site tag is intended to be on every page in your site, so the easiest way to accomplish that is by adding it to your theme.
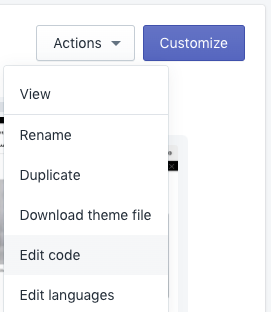
In your Shopify Admin, click on Online Store > Themes. Then, from your current theme, you’ll want to click the dropdown and choose Edit Code.
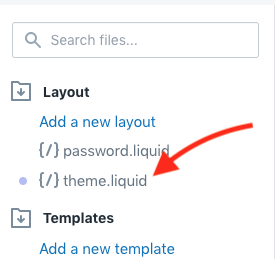
Copy and paste the Global Site tag from Google Ads into this area in the theme.liquid.
Installing the Conversion Tracking Snippet in Shopify Settings
Next, we have to add the 2nd code snippet generated by Google Ads. This one is the conversion tracking snippet.
In your Shopify Admin, go to Settings > Checkout. Then scroll down to Order Processing. There you’ll see the box where you enter custom checkout scripts. That’s where we’re going to paste the conversion tracking snippet.
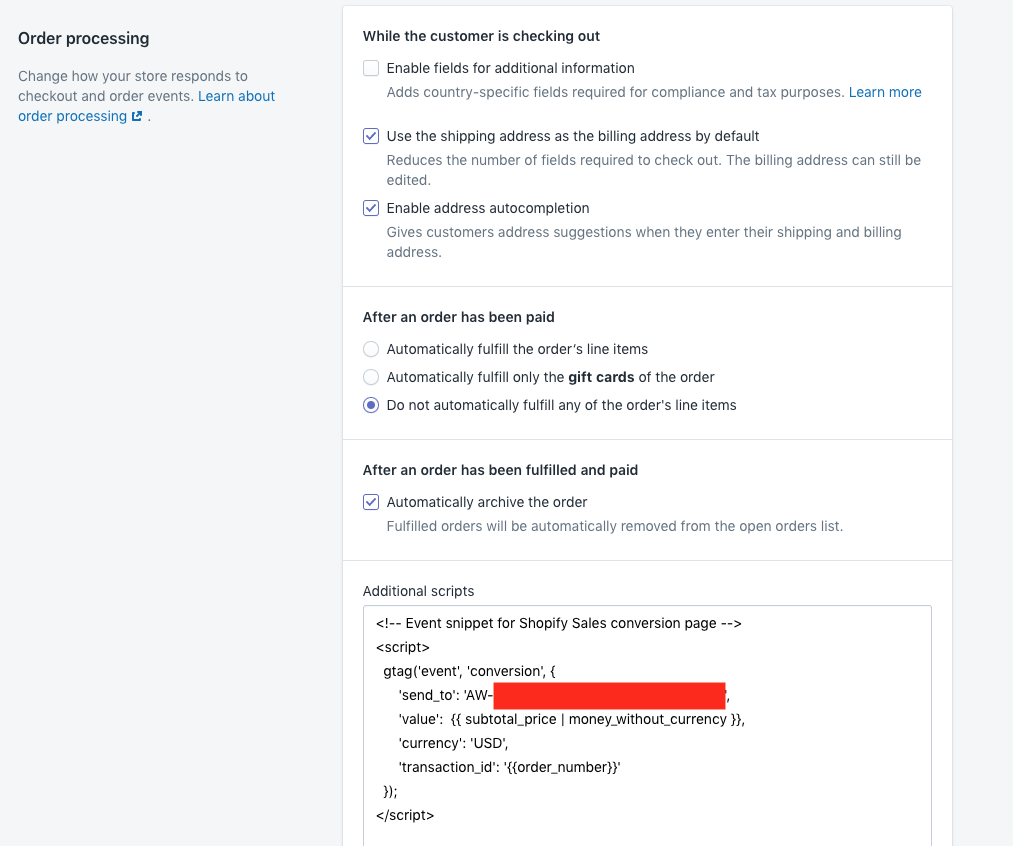
Paste the following code into ‘Additional scripts’:
<!-- Event snippet for Shopify Sales conversion page -->
<script>
  gtag('event', 'conversion', {
      'send_to': 'AW-YOUR-LABEL-GOES-HERE',
      'value':  {{ subtotal_price | money_without_currency }},
      'currency': 'USD',
      'transaction_id': '{{order_number}}'
  });
</script>
Make sure that you replace ‘send_to’ with the value that was generated for your by Google Ads above.
The official Shopify documentation handles this a little bit differently and wraps the code with some extra logic to insure that conversions aren’t tracked twice, but that code tends to never work properly for me, so I leave it out.
That’s all! It wasn’t so bad, was it?
Avoid Double-Counting Google Ads Conversions
If you have successfully configured native Google Ads conversion tracking AND Google Analytics conversion tracking then you want to make sure that you aren’t double-counting.
I recommend always using the Google Ads conversions directly in Shopify if you can and only importing conversions from Google Analytics when necessary. If you have both on and working then you’ll double-count each sale, which will look really great but isn’t reality.
If you are double-counting, then decide whether you want to keep the conversions coming in from Google Analytics or the native conversions from Google Ads. Then just click ‘remove’ on the other conversion. Don’t worry, you can always turn it back on later.
Conversion Tracking ✅
That’s everything. That’s exactly how we configure conversion tracking for our clients.
If you have any questions about conversion tracking then feel free to ask in the chat window.
Also, conversion tracking snippets tend to change a bit over time, so if you ever see that our guide is outdated then please let us know!
If you need help implementing conversion tracking or want ecommerce marketing experts to take a look at your campaigns, then feel free to Contact Us.
Leave a Reply